Image Map

Thursday, September 1, 2016

Weekly Homework

For the past few years I haven't given a lot of homework. I try to give plenty of time to accomplish all projects/assignments in class. One such time that doesn't happen, is if students are unable to finish the math assignment during their work time then it is sent as homework. Other than that my homework is simple. 


Click HERE if you would like a copy of my weekly homework sheet.

In my classroom required homework is to read every night - 20 minutes. Study your spelling and work on your math facts. See simple. All of these things are things that need to be done to help a child succeed. 

Now wait. I know that many of you believe, like I do, that spelling is a waste of time. However, I have worked in schools and districts that feel that spelling is essential. Therefore, since I appreciate my job, I am willing to do spelling. In later years I have found a slight way around the spelling concept. Instead of simply studying lists of unrelated words, we have used lists of greek and latin root words....I love these! A simple list of 5-10 words. Before I get too far off topic let's just say these are amazing. I will have to post about them on a later day.

Back to homework...

It doesn't matter if you are in 2nd grade or 6th grade math facts should be incorporated into weekly study. I haven't met a child yet who doesn't improve by spending a few extra minutes working on their math facts. We work on math facts in our class on Mondays as a part of Math Fact Mondays but the constant practice at home is extremely beneficial. 

I know of a colleague that uses the math fact boxes not as math facts practice but as a way to mark off their work on Aleks. Either way a few extra minutes working on math never hurt anyone. 

Finally, reading. Reading daily doesn't have to be painful. It just needs to happen. Knowing how many minutes and how many pages are read every night can help me, as a teacher understand a lot about a student. If you are reading every night for hours and only make it though a small number of pages than I know you are really struggling or the book you are reading at home may be a tad too hard. 

Each week I can spend only minutes glancing over this homework sheet to know if my students are completing the tasks I have asked of them. 

____________________________________________________
Need some math facts game ideas? Try out these: 

Today's games are made by the same company. You can change easily change the type of facts and numbers your child/student is seeing. The first is more of a timed fact practice. You can play against the computer or play split screen and "duel" against a classmate. 


Grades 1-5 Monster Math Duels - This is the one that lets you duel with a split screen.
At the top it tells you what the answer should be - in this screens shots case what the sum should be. Your job is to tap on all of the equations equaling to that numbers. As you get better you have to move around to beat the clock and not get eaten by the other monster present. 


Or duel

When on dueling mode you are able to play so that both students are able to work on the level that is right for them. In the above picture you will notice that on the "mom" side all of those blobs are using division while Jack's side is practicing addition.


Monster Math - Free Children's Education Games for Learning...
The second is presented in more of a storyboard format. You answer select facts along your journey through the monster world. 


Tuesday, August 30, 2016

Back to School Notes


At the start of the new year I always need to gather information from parents and students. This past year I had to fill out an insane amount of paperwork for my oldest two kiddos. LOTS AND LOTS - so I understand not wanting to fill out another paper. After sorting through all of the notes I have used in the past and looking at notes my children brought home; I carefully chose three. Three notes that I thought would be the most beneficial to myself as a teacher, and ones I wouldn't hate to fill out as a parent. :)


Parent Helper Notes:

I love parent helpers. Over the years I have found that parents often want to help but it scares them a little bit. They often don't know what would be required of them, and it feels overwhelming and daunting. This note gives them a clear understanding, right from the beginning, of what they can do. 

First are questions about how a parent wishes to help, both in and out of the classroom. Next are questions asking when they are wiling to help. All essential questions to get parents and guardians and involved as soon as possible. 

The next note I chose was a 
Student Information Note:


This can be the hardest for parents to fill out and yet if we really read it as a teacher can be the first insight into our students. 


Personal Note - my own son has really struggled with a love of reading. He would do it if we made him or his teachers asked them but there wasn't a love behind it at all. I was given a student information sheet where I was able to share with his teacher his love of science and animals. A few weeks into school my son started coming home beyond excited about the books he was reading in reading groups. Books about spiders, volcanoes, and stars. When I mentioned it to his teacher she told me that she had gone back and read through the notes again looking for insights into my little guy. Not only did it melt my heart but changed the way my boy looked at reading. 

Finally I have a media note:

There are times when we show different clips of media to help deepen understanding, build a little scheme or simply have fun. This note is only returned if parents have a problem with your use of media.

There you have it three carefully chosen and designed notes. 

If you are interesting in purchasing a set for yourself click HERE.

Recap...
If you are like me and want notes that are clean, easy to read, and coordinate with your classroom then these are for YOU!

Notes included:
* Parent Helper Note
* Student Information Note
* Media Permission Note

ALL notes are included in the following themes:
* Beach
* Baking/Chef
* Classroom Supplies
* Art/Artist
* Cartoon Mouse
* Cowboy
* No graphics
Need an different note in one of these themes? Want a different theme? Let me know and I am happy to make that happen.


Tuesday, August 23, 2016

Organization - Monthly Binders

Maybe your filing cabinet is like this....


or maybe it isn't. I know there are certain times that my files have been less than beautiful, and even if they haven't been overflowing like this picture I admit I have often had a drawer or shelf full of loose papers that needed my attention. I hated seeing the piles or messy files. 

Besides being a teacher I am also a wife and a mom to three wonderful kids. Sometimes balancing all of my responsibilities can be a bit of a challenge. One of the things I have learned over the last 9 years of teaching is that I must be organized. I love ways that help me complete my teaching responsibilities quickly and efficiency so I can spend the rest of the day with the people I love the most. 

Over the years I have tried a number of different methods to keep my teaching world organized. Finally, last year I while searching Pinterest I came across a number of posts about binders. I saw binders based on themes and subjects...I liked these but I would have needed a bundle of binders. Not really a great solution for me. With a little bit of research I found the ideas of monthly binders.

I started looking into the binder idea and planning for it. I bought a number of binders, one for each month (August through May). I started designing covers, printing and collecting sheet protectors. I printed out my covers and slipped them into my binders. I decided which subjects I wanted to have in each binder. Printed those and placed them in plastic sheet protectors. 

The really fun started at this point. I went through my messy files and pulled out one of the things I needed and used. I place each master in the correct binder behind the specific subject heading.

As a teacher your time is precious. No one wants to spend hours and hours printing and copying files that you use each year. At the start of the month I grab my binder and head to the copy room. In a single afternoon I can get all of my copies done without the stress of looking for each of my files. Once the pages were printed I kept them in my filing cabinet by subjects. I reuse the same folders over and over again.

Need to plan what lesson comes next? No problem. I grab my single binder and my reading group lessons, math lesson and task cards, science lessons and everything else is right at my fingertips.

Setting up the binders took a little bit of an investment in time and materials, especially with buying the binders but it was completely worth it.

I gushed all year about my fabulous binders that a colleague and friend of mine asked me to create binders for her cowboy themed classroom. I was happy to oblige.
Look how cute they turned out!


Of course once I saw hers I wanted to update the covers of my own binders. Luckily for you both are now available on my TPT store.

For the cowboy flair binders click HERE

For the cartoon mouse, aka Mickey, binders click HERE.

Tuesday, August 9, 2016

One Year Sabbatical

I absolutely love this time of year. I love the excitement of decorating and prepping things for my new year of kiddos. I love boxes and bins of new school supplies. I love the anticipation. I love all the energy that I seem to have as I am planning and prepping all of my lessons. This year it is a bit different.

This year I am taking a sabbatical while my husband finishes his last semester of law school. He only has one semester, which means we are only going to be gone for about six months. Since missing six months wasn't a real option the sabbatical seemed like our best decision. I admit I cried taking my classroom down. I love teaching and that part of my life. Not having school is going to be hard. The best part is going to be the year spent at home with my little girl. It will also be great to spend the year attending my older two's classroom parties and special events. 

To make this happen we packed up half of our stuff and moved our little family across the country. We have spent the last week moving into our apartment and adjusting to life away from what we have known. The one thing that has helped me feel connected to the classroom is still doing what I do best. Planning and creating. I hope you will continue to follow me and see what fun products I have to share with you this year. 

 All packed up and ready to go. (See my tiny trailer? Not bad for a family of 5!)

Driving. Pulling a trailer took us 40 hours! It was a long drive.

Mt. Rushmore just one of the stops my little family made. 

Monday, March 14, 2016

From Fraction to Decimal Equivalent Forms

I loved this activity! It was one of those moments when everything simply falls into place. Hooray! One of the concepts I needed to make sure my students understood was the number of ways you can write a fraction, including decimal form. CHECK! I wanted my students engaged. CHECK! I wanted conversation happening among my students. CHECK!


This activity would be great for a math warm-up, a quick review, center activity, or whole class activity like we used it! If you are interested in this activity purchase it HERE.

All of the materials were copied in different colored paper.  I personally chose to leave the first page of this activity white. This was done to help students find the first card.  After copying all of the pages I cut apart all of the strips and all off the fraction pictures. 

I placed the white strips around the room. My students sit in table groups so I gave each table two white strips. I loved leaving these strips there for a chunk of time before math. It drove a few of my students a bit mad because they really wanted to know what they were for. (Love the touch of torture!)  
(Sorry it's on its side - it wouldn't rotate.)

Before we started I took a moment to model what we were looking for in this activity. I told my students we were going to look for equivalent fractions and decimals. I wrote "1 out of 10" on the board. I then wrote 1/10 and asked if they were equivalent. If they were I left it up. If not I crossed it out. Then I asked if 0.1 works. Yes I left it. I wrote 0.01? Nope and crossed it off. Once my students had a solid understanding of the task I scattered the rest of the colorful strips randomly among my students.

I told my class that each group had a number of colored strips. They had to start with the white fraction strips at their own table, then they had to go through all of their remaining strips to check if they had any equivalent to the white strip(s) on their table. 


When they found an equivalent value they placed it below the first white strip. Once they finished going through all the strips they could move to the next white strip. My students continued to move around the room looking for anything equivalent. However, if a strip did not have an equivalent strip it goes on the “trash can”.

At the end I went through the trash can. If it was correct I gave them a happy point. If it was incorrect we fixed it and then they earned a “meh” point. Happy points they won, "meh" points I won.

Today was a success. Whether you are teaching this concept for the first time or simply reviewing this activity will keep students engaged. Check it out in my TPT store HERE.


Tuesday, February 16, 2016

Simplify Fractions Worksheet

My students love pixel art. I don't know what it is about coloring in little squares and watching all of those little squares become something special...but it is magic to them. When I realized we desperately needed practice simplifying fractions I knew I needed to combine the two concepts. 

Hello - brilliant!

Let me introduce you to a classroom favorite! 


The preparation is simple for this activity. Copy the blank grid worksheet for each student. Then I offer my students a little bit of advice. I tell them that a whiteboard or scratch paper can be extremely helpful. Tell them to pick a square. (Of course I model this for all to see.) I write the fraction, simplify, find the answer in the coloring code and color. If it is supposed to stay white I have my students draw a light line through it with a pencil. This lets them know it has been done and should stay white.

Next I tell my students that the next part is the most important part. They are welcome to do each fraction one square at a time. It works, but it can take a long time. Personally, I tell them, look through the puzzle finding all the other duplicates of the same fraction and color those in. This helps the picture appear a bit faster and students get excited to start to see the picture coming together. 

TA-DA! This is what our picture turns into: a delightful cupcake!


This worksheet is great for giving additional practice, a wonderful fast finisher and a spectacular piece of extra credit. Click HERE to go directly to my TPT store. Give it a try. I know you will love it - my students do!

Sunday, February 14, 2016

Crazy Day

When the weather looks like this...

And has for many days in a row it starts to take its toll. I knew by the middle of last week that we needed a break from "normal" life. 

We decided to have a CRAZY DAY! When I scheduled the day I wasn't sure what it would entailed but I knew we would wear our pajamas while doing it! 


When the day is cold and foggy pajamas and a sweatshirt make everything a bit easier to bare. My students loved them too. I had more than one that told me how "cozy" they felt. 

Other than wearing pajamas I wanted our day to be a bit unusual. I need things to be exciting even while doing the normal everyday core lessons. After a bit of research I found exactly the app I was looking for.


This app is called Spinny Wheel and only cost $0.99. This was it! My golden ticket! My source for crazy day.


On Spinny Wheel you are able to program the activities you want and how many "lives" each section will have. (A life is how many times you can land on that section of the pie.) If you want you can even change the likelihood you will land on a specific slice. I didn't worry about that. I simply put in our normal core lessons and added a few fun games. 

I introduced the wheel to my students. We used tickets to randomly draw out a name. The selected student came up and spun the wheel. They cheered when it would stop on a subject. The timer was set and we were off. 


My students loved doing our normal things out of order! To be honest, so did I. We laughed a lot while each time the wheel was spun. Then we got to work and finished our work.


CRAZY DAY was such a success it is now on the books for once a month. I can't promise we will wear pajamas but we will use the wheel and mess up as much of our schedule as we can. 

Give it a try! CRAZY DAY can make any ordinary day feel special. 

Friday, February 5, 2016

Valentine's Calendar Project

It's February! The snow has been coming down in full force. We have spent many recesses indoors and needed a fun project. Maybe you need something to take up time or need something fun for your hallway display. If you fit any of these categories I would like to introduce...


CALENDAR ART


Grab a bunch of old calendars and tear them apart. Our school was given a bunch of old calendars. They simply sat in our workroom doing nothing but gathering dust. Maybe you have a stack of old calendars or can grab some from your local dollar store. It doesn't matter the pattern or picture. We used calendars with flowers, tigers, penguin, drawings, dogs, landscapes and even people. Really, anything can work. 


Next cut your calendar in thin strips. It doesn't matter the direction you cut it or if the strips get all mixed up. (In fact it looks better when it does get all mixed up.)


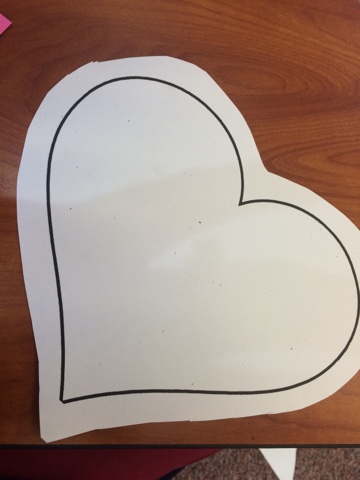
Give each student a photocopied heart on white construction paper. I told my class to bubble cut out their heart and then flip it over. 


Instruct students to glue a section of their heart and then lay their strips onto their heart. I told my students I didn't want to see any white showing through. If a strip was crooked they should overlap the strips.

See...


Finally cut around your heart. I suggest doing this over the garbage can since all the scraps will flutter all over if you don't. Glue your finished heart to a piece of construction paper and hang up.

They are very simple and yet we have received lots of compliments.

Happy Valentine's Day! 

Monday, January 18, 2016

Chicken Fajita Soup

I don't know if you are a mom, a wife, and aunt, a friend... basically if you are a human being you are busy. We all are. There is nothing better than coming home after a long day at work and knowing that dinner is already done. It's lovely to unlock the door and the heavenly smell of the work being done greets you. :)

Personally, I am the full time mom of three and wife of one, and that doesn't leave me lots of time to rest my weary feet after a full day at school. I have been on the search for fabulous recipes that can be prepped ahead of time or that can spend the day in the crockpot. 

Welcome to Make Ahead Meal Mondays. On the 3rd Monday of each month I will be hosting a Linky Party with all of you. I hope you will visit often. Link up some of your favorite recipes and see what recipes others share too.

My recipe to share is a delicious Chicken Fajita Soup. I found this delicious soup recipe on

Ingredients


  • 1 pound boneless, skinless chicken breasts
  • 2 (10.75 ounce) cans condensed cream of chicken soup
  • 1 cup salsa
  • 2 cups frozen corn
  • 1 (15 ounce) can black beans, drained and rinsed
  • 1½ cups water
  • 1 teaspoon ground cumin
  • ½ teaspoon dried cilantro
  • 1 cup shredded cheddar cheese
  • Optional Toppings:
  • sour cream
  • diced tomatoes
  • green onions
  • cilantro
  • lettuce
  • diced avocado
  • tortilla strips
Instructions
  1. Spray your slow cooker with cooking spray. Add chicken to the bottom of the slow cooker.
  2. In a medium sized mixing bowl, mix cream of chicken soup, salsa, corn, black beans, water, cumin, and cilantro. Pour over the top of chicken.
  3. Cook on low for 4-6 hours. Remove the chicken and shred with two forks. Place back into the slow cooker and add shredded cheese. Continue cooking until cheese has melted about 15 minutes. Serve with your favorite toppings.


I am telling you this is tried, tested and OH delicious!

Tuesday, January 12, 2016

The best part of my day...


There is nothing like a phone call, moments before school begins, from the daycare telling you that your little girl threw up all over another child! I admit I laughed. 

I had a momentary chuckle and then got busy getting a sub and getting things ready for someone to take things over so I could go and rescue my sweet girl. I feel very blessed to have a team of teachers and friends that were there and willing to let me simply walk out the door. I didn't do it - not completely at least. I jotted down a few sub notes with the promise that they would translate if needed. 

I found my baby curled up in lap of one of her supervisors. They had cleaned her up but I could tell she was exhausted. Even then she had a giggle and a bright smile for me when she saw me. Makes a mama's heart melt. 

We haven't done much today...it is the best kind of days.  I have held and simply snuggled this sweet girl. It isn't very often that I get to take advantage of these sweet moments. 


When she got tired of sleeping on me she wanted to sleep in her crib and I have gotten a few things done. I had to take a moment and thank heaven for moments like this one. Nothing else in the world mattered right then but her.